
Snowflake
Follow these steps to use Snowflake as your target.
Step 1 - Connect to Snowflake
Create a new connection
Click Create a new connection, if it is not already selected.
In the Connection String field, enter your connection in the following format:
jdbc:snowflake://<ACCOUNT_WITH_REGION>.snowflakecomputing.com?db=<DB_NAME>&warehouse=<WAREHOUSE_NAME>&role=<ROLE_NAME>where:
ACCOUNT_WITH_REGION.snowflakecomputing.com: The connection URL in Snowflake, for example,snowflakedemo.us-east-2.aws.snowflakecomputing.comDB_NAME: The name of the target database.WAREHOUSE_NAME: (Optional) The name of the target warehouse, otherwise the default is used. If no default warehouse exists, the connection will fail.ROLE_NAME: (Optional) The name of the role to use, otherwise the default role is used. If no default role exists, the connection will fail. To ensure proper functionality and access for our user when connecting to Snowflake, the following permissions need to be granted in snowflake:Grant usage on the specified database:
GRANT USAGE ON DATABASE <database_name> TO ROLE <Role_name>;Grant usage on the specified schema within the database:
GRANT USAGE ON SCHEMA <schema_name> TO ROLE <Role_name>;Grant permissions to create tables and stages within the specified schema:
CREATE TABLE, CREATE STAGE ON SCHEMA <schema_name> TO ROLE <Role_name>;Grant permission to create schemas within the specified database:
CREATE SCHEMA ON DATABASE <database_name> TO ROLE <Role_name>;
Read more about connection string arguments in Snowflake.
Provide the Username and Password that will be used to authenticate to the database.
In the Name your connection field, type in the name for this connection. Please note this connection will be available to other users in your organization.

Use an existing connection
By default, if you have already created a connection, Upsolver selects Use an existing connection, and your Snowflake connection is populated in the list.
For organizations with multiple connections, select the target connection you want to use.
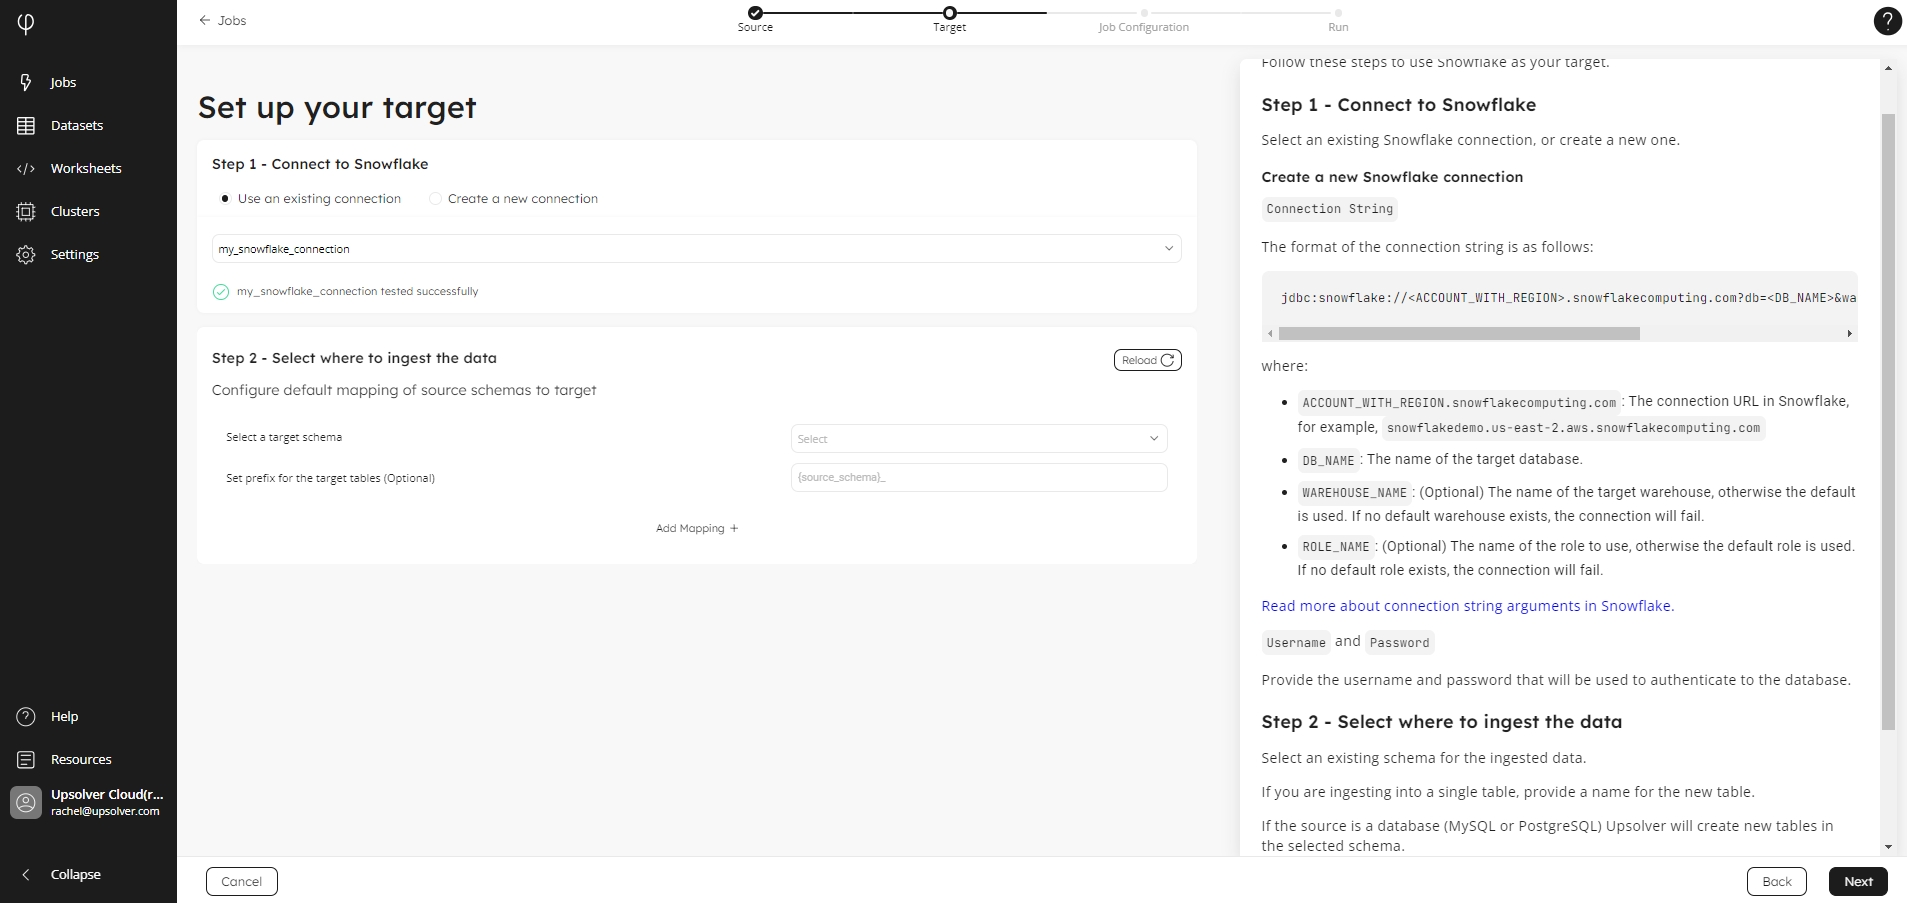
Step 2 - Select where to ingest the data
Select an existing schema for the ingested data in the Select a target schema list.
If you are ingesting into a single table, provide a name for the new table. If the source is a database (MySQL or PostgreSQL) Upsolver will create new tables in the selected schema.
When ingesting multiple source schemas into Snowflake you have the following options:
Ingest all tables into a single Snowflake schema and add the source schema name to every new table created in Snowflake.
Map every source schema into a target schema in Snowflake.
Last updated