
VPC Peering Guide
This article describes the steps necessary to implement VPC peering in AWS.
This article provides a guide on the steps necessary to implement VPC peering in AWS.
In order to connect to other EC2 resources (e.g. Kafka, databases, etc.), you need to peer the VPC in which the resources are allocated and the private VPC created by the integration.
To peer the VPC, you need to:
Glossary
Your VPC - The VPC containing your resources that you want Upsolver to be able to connect to
Upsolver Private VPC - The VPC Upsolver is deployed in. By default this will be a new VPC created by the integration process for Upsolver.
Create the VPC peering
1. In the navigation pane, select Peering Connections.
2. Click Create Peering Connection and fill in the form.
3. Give the peering connection name a meaningful name (e.g. Upsolver to Kafka).
4. Select your VPC as the requester.
5. Select Upsolver Private VPC as the accepter.
6. Submit the form and click OK.
7. Right-click the new VPC Peering Connection and then click Accept Request.
Follow the on-screen instructions to accept the request.
Alter the route tables
To enable the VPCs to access one another, it is necessary to alter the route tables in both VPCs.
It is important to identify the correct route tables to alter. A VPC has a default route table which acts as the routing table for any subnet in that VPC that has not been explicitly assigned a different routing table. As a result, you may not just edit the default rout table, you need to check which route tables are being used by the subnets.
Identifying the correct routing tables to modify
In the navigation pane fill in the Filter By VPC text box:
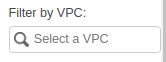
This will filter all the tabs on the left and allow us to easily find the routing tables we should modify.
Click on the Subnets tab.
Locate the subnets that are being used by Upsolver / your resources.
For each subnet, click on it and then click on Route Table to see the routing table associated with the subnet:
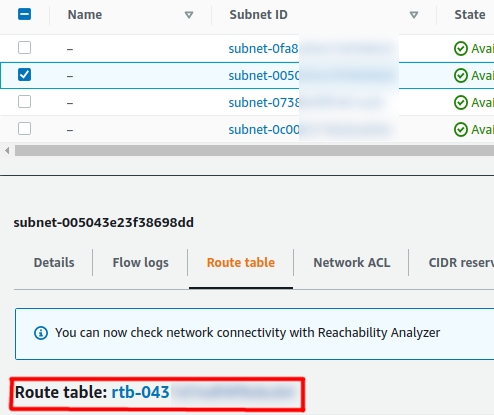
Write down the routing tables you identify this way. These are the routing tables we will need to modify. Typically you will only have one per VPC to modify, but complex VPC setups may have more.
Altering the route tables
In the navigation pane, click Route Tables.
For each route table you wrote down in the previous step
Locate and select your VPC’s route table.
In the details pane, click Routes > Edit Routes
Click Add Route and enter the details below:
Destination
Enter the Upsolver VPC IPv4 CIDR.
Target
Select Peering connection and choose the connection.
4. Submit the form and click Close.
5. Repeat these steps, this time altering the route tables of the Upsolver Private VPC to include routing to your destination VPC (in step 2.3 fill in your VPC IPv4 CIDR.)
Alter security groups
Now that the VPCs are peered, you need to alter the security groups of your instances to allow inbound and outbound connections from the Upsolver Private VPC.
1. Navigate to AWS EC2 Dashboard.
2. Ensure the correct region is selected in the navigation pane.
3. Click Instances in the navigation pane.
4. Locate your instances and find a suitable security group or attach a new security group to all of the instances accessible to Upsolver Private VPC.
5. Navigate to the security group by selecting the group in the details pane.
6. Click Inbound > Edit.
7. Add a rule with the details below:
Type
All Traffic.
Source
Custom; enter Upsolver Private VPC IPv4 CIDR in the text box.
Description
Upsolver Private VPC.
8. If there is no shared security group between all the instances, repeat steps 5-7 for all the security groups needed.
Last updated